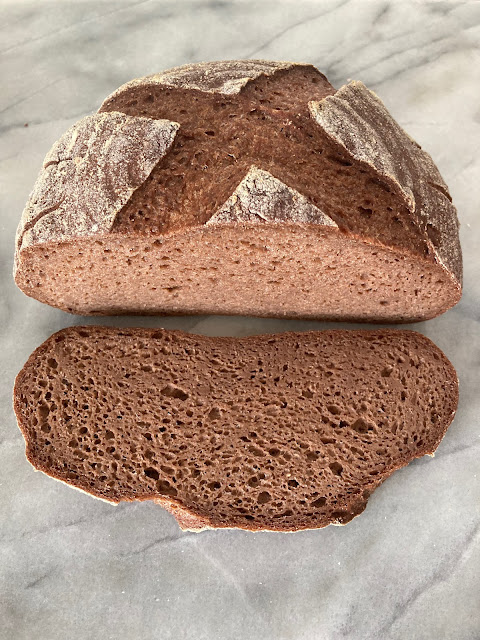
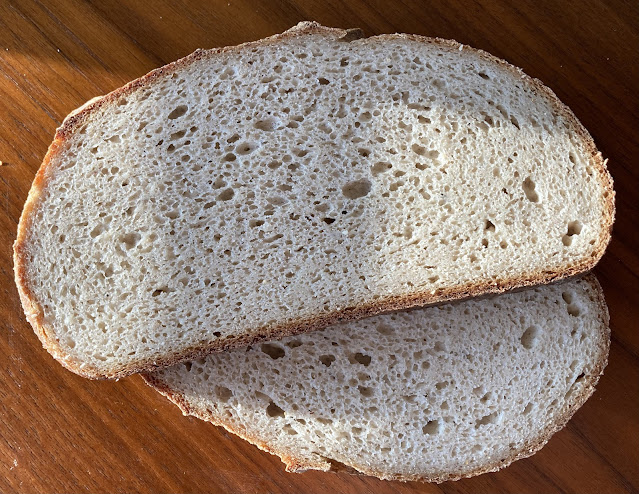
Updated Boule Bread Recipe
This is a re-post of the 2-lb Boule Bread Recipe that I have updated with a better method for superior flavor and browning.
Updated again on 7-16-2021 with some minor adjustments to ingredient amounts.
For those who have been following my gluten-free bread recipes, I'm giving you another in the series. This one is very similar to the Traditional Round Loaf recipe, but you get a larger loaf, about a 2-lb. This recipe uses my Bread Flour mix, or the Rustic White Bread Flour blend, which are pretty simple to make.

Gluten-free Bread Recipe - Large Round Loaf
makes one 2-lb round loaf
Mix time: 10 minutes
Rise time: 2-3 hours
Cook time: 35-45 minutes
Mix in the bowl of your stand mixer or whisk together by hand:
490g (about 2 to 2 1/4 cups) warm water, 110-120 degrees
27g whole psyllium husk (or 20g ground psyllium husk)
Add to the bowl:
375g GF bread flour (reserve an additional 75 grams for later in the recipe)
1-2 Tbsp sugar
1 tsp yeast
Mix the dry ingredients into the wet ingredients until everything is completely combined and a sticky dough forms, firming up quite a bit, at least 5 minutes.
Let the dough rise in a warm place for an hour or two, or until it has almost doubled in bulk and a dent made with your finger stops filling in right away.

Punch it down.

Knead in with your hands or the dough hook of your mixer:
75g flour
8-9 g (1 1/4 tsp) salt
1 TBSP apple cider vinegar (optional)
1 TBSP apple cider vinegar (optional)
Knead the dough mass a few times with your hands to create a cohesive ball with the seam of your kneading tucked over on one side. (Optional for better browning: oil the dough or spritz with water to prevent drying and for better browning.) Remove the dough to a banneton seam side up or simply place the dough ball seam side down on a piece of parchment paper. Cover, and let rise 45 minutes to 1.5 hours in a warm place.

While the dough is rising, place a dutch oven or a pizza stone and an oven-safe pan large enough to cover the bread in the oven and turn it on to pre-heat to 450° F for about half an hour before cooking. When the bread has risen and and a dent made with your finger stops filling in right away, gently place the dough seam-side down on your lightly floured work surface, trying not to deflate it. Lightly flour your hands. Gently run your hands along the sides of the dough, tucking the sides under and turning the loaf around as you go to get all edges tucked under. The top will be more rounded than before and stretched a bit more tightly.
When the oven is ready and the dough has been formed, score the top with a sharp blade about 1/4 inch deep in whatever pattern you want.

Carefully place the bread in the hot dutch oven or on the hot pizza stone. Spritz the inside of the dutch oven (or the surface of the pizza stone) with water several times (careful not to spray any glass lids - they can shatter!) and cover. Cook for 25 minutes, then uncovered on the rack until the crust has a hollow sound when tapped on top, usually another 10-15 minutes. Remove to a cooling rack, or for a crisper crust turn off the flame and cool in the oven with the door propped open. Let the bread cool completely for easier slicing.

Enjoy some traditional gluten-free bread!

Comments
I used this recipe yesterday in conjunction with your flour mix - wow! I've been making sourdough (not gluten free) loaves for a few months now, but the smell of this loaf coming from the oven blew it out of the water! I was surprised that it turned out so well, and the taste and texture was superb.
This was the first gluten-free loaf of mine, but there will be many more to come. At some point I will have to start making these with a starter instead of the instant yeast. Thank you once more - this blog is a great resource!
Alex
As for storing the dough in the fridge, I do that occasionally. How I manage it is I put it in the fridge after the first rise - I don't punch it down or anything, I just cover and chill. Then on the day that I bake, I take it out and let it warm up to room temp, punch it down, mix in the remaining flour, rise, and bake. I can't remember if I've tried chilling it after the second rise. That might work too if it's already more or less formed or in a banneton. That second rise can go up quickly though so definitely watch that you don't over-proof if you try this. It'll still ferment a bit in the fridge. Hope that helps!