Sourdough Starter in 3 Days
Update:
See my updated version of this recipe: https://glutenfreegourmand.blogspot.com/2021/10/sourdough-starter-ready-to-use-in-3-7.html
When I was a kid, my dad loved to make the family sourdough bread on the weekends. I loved watching him feed the starter, knead the dough, and put a raw lump into the oven to see a golden half-globe of bread emerge later. We could get really good fresh San Francisco sourdough bread in the store, but that had nothing on my dad's bread. It was one of my favorite foods.
I like my sourdough really sour in the San Francisco and pioneer traditions. My dad's sourdough was from an old country recipe that was handed down from a farmer neighbors, the Lists.
I decided to track down the recipe and re-create it, gluten-free. When I get an idea in my head to re-create a recipe I loved as a gluten eater, I'm like a dog with a bone. I just work on it tenaciously until the job is done.
I started researching wild yeast sourdough starters about a year and a half ago. It turns out that gluten-free grains ferment very easily. In fact, the first sourdough starters were made as long as 20,000 years ago from teff and sorghum. So my very first attempt at a sourdough starter was a success, in that it grew tons of yeast and looked remarkably like a starter made with wheat flour.

It looked like what Pops used to make - but it didn't taste sour. Plus, it was using up my precious bread flour at a rapid rate, and I sometimes couldn't get to the twice-a-day feeding on time. Sometimes it would start smelling off, but I didn't know why. It was like a finicky pet.
Today my starter is completely different, and in every good way. It's sour, to start. I only feed it once a day and I use plain sorghum, one of the less expensive and most easily available flours. I only use 50 grams of fresh flour a day. And the stuff smells delicious - just like I remember from when I was a girl. It doesn't have the classic country crock look, but it's a formula that only takes three days to start up, rather than the typical two weeks of traditional recipes.

I came across the concept of a three-day wild yeast sourdough starter through the blog Ars Pistorica written by baker and sourdough expert Ian, (aka Ars Pistorica on The Fresh Loaf), who recently opened his own bakery Apiece in Launceston, Tasmania. With opening a new business he decided to take a break from blogging, so his original wheat-based recipe and all his notes on gluten-free baking are not online at the moment. I recorded and tested some of his ideas and used some of my own observations, and eventually came up with a sorghum-based starter that is stable, smells beautiful, and gives the bread great rise and flavor. As a bonus, I only have to feed it once a day.
Step 1
In a gallon-size bag, mix:
50 g Sorghum Flour
120g Spring water at room temperature
Seal the bag and mix the flour and water until well-combined. Let any air out of the bag and re-seal. Double bag the mixture and let any air out of the second bag, too. Place the bag in a container of water heated to 95 degrees (35 degrees C). Seal the container or keep it on a heating pad. Check it frequently to make sure the water temperature stays constant. Keep the bag at 95 degrees for 24 hours.
Step 2
Open your double-bagged sorghum mixture, being careful not to get tap water inside the bag. If the mixture smells bad, this is a good sign. It means you have successfully cultivated some of the bacteria that you need for the starter. Add:
50 g sorghum flour
80 g spring water
Seal the bag and mix as before. Let any air out, re-seal, double bag, and immerse the mixture in 90-degree water (32 degrees C) for 24 hours, making sure the water temperature remains constant.
 Step 3
Your mixture should be bubbling after the second 24 hours in warm water. This is a good sign. The bad smell should be replaced by a more sourdough-type smell, but it can vary at this stage. Mix the contents of your bag thoroughly. In a small clean (but not chemically sanitized) plastic container place:
15 grams of the water-and sorghum mixture from step 2
60g spring water
50 grams sorghum flour
Let the mixture rest for 24 hours, covered, at room temperature.
Congratulations, you now have a sourdough starter! You can start using it to make sourdough bread now.
Maintenance
Feed your starter every 24 hours at the same time of day:
5 grams starter from the last batch
60 grams spring water
50 grams sorghum flour
Mix with a wooden spoon to combine, cover, and let sit at room temperature for 24 hours. You can use your starter any time after the first 6 hours of fermenting, but always leave enough to make your next batch. The starter will give you the best yeast flavor at six hours, but the optimal time for a sour bread flavor is between 18 and 24 hours.
Double/triple the recipe if you need more starter, but you should only need about 50-100 grams of starter per 2-lb. loaf.
Discard any starter that you don't need, or use it to cook something like these sourdough pancakes, which uses the discards of one day's maintenance.
Troubleshooting
If at any point you mess something up, don't hesitate to start over. You will probably end up saving flour in the long run.
The number one problem I had was getting leaks of tap water inside the bag. Tap water has chlorine in it to kill microorganisms. You are trying to grow microorganisms. Once I started double-bagging the mixture in step one and two I got much better results.
Don't worry about weird smells, especially at the beginning. Sometimes it can take a week before everything really stabilizes in the starter, and it can smell different at different times of day, too. The only smell that's a sign of serious problems is the smell of acetone, like finger nail polish remover. It's a very strong and unmistakeable smell. Acetone means you have to throw your starter out and start over.
If anyone has questions to trouble-shoot, leave them in the comments and I can add them to the trouble-shooting list.
* This recipe should work with dark teff flour as well, but I haven't tested it extensively. Amaranth flour is the only other flour I think might work, but I've used sorghum because it's the most economical and the most widely-available gluten-free flour. Other GF flours have not done as well as these three flours in published scientific experiments as well as in my own kitchen experiments.
I like my sourdough really sour in the San Francisco and pioneer traditions. My dad's sourdough was from an old country recipe that was handed down from a farmer neighbors, the Lists.
 |
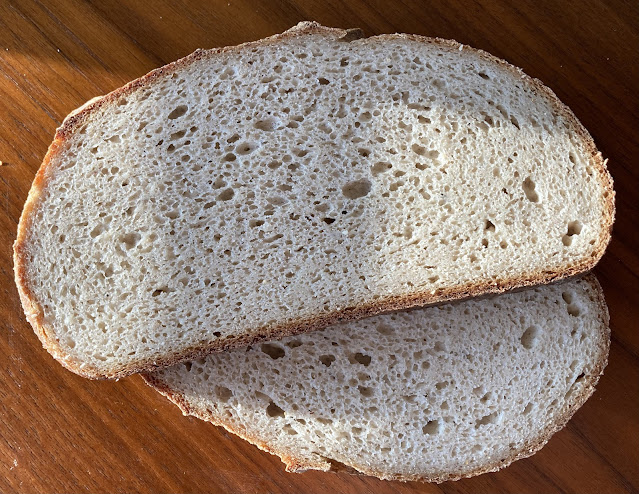
| Old List Family Sourdough Bread Recipe |
I decided to track down the recipe and re-create it, gluten-free. When I get an idea in my head to re-create a recipe I loved as a gluten eater, I'm like a dog with a bone. I just work on it tenaciously until the job is done.
I started researching wild yeast sourdough starters about a year and a half ago. It turns out that gluten-free grains ferment very easily. In fact, the first sourdough starters were made as long as 20,000 years ago from teff and sorghum. So my very first attempt at a sourdough starter was a success, in that it grew tons of yeast and looked remarkably like a starter made with wheat flour.
 |
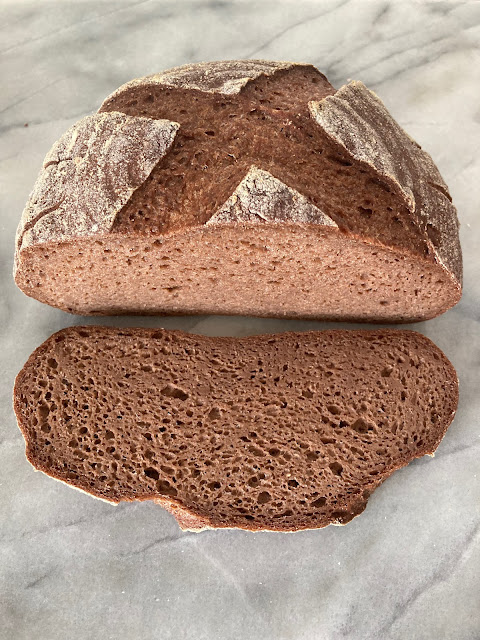
| My first GF SD Starter |
It looked like what Pops used to make - but it didn't taste sour. Plus, it was using up my precious bread flour at a rapid rate, and I sometimes couldn't get to the twice-a-day feeding on time. Sometimes it would start smelling off, but I didn't know why. It was like a finicky pet.
Today my starter is completely different, and in every good way. It's sour, to start. I only feed it once a day and I use plain sorghum, one of the less expensive and most easily available flours. I only use 50 grams of fresh flour a day. And the stuff smells delicious - just like I remember from when I was a girl. It doesn't have the classic country crock look, but it's a formula that only takes three days to start up, rather than the typical two weeks of traditional recipes.
I came across the concept of a three-day wild yeast sourdough starter through the blog Ars Pistorica written by baker and sourdough expert Ian, (aka Ars Pistorica on The Fresh Loaf), who recently opened his own bakery Apiece in Launceston, Tasmania. With opening a new business he decided to take a break from blogging, so his original wheat-based recipe and all his notes on gluten-free baking are not online at the moment. I recorded and tested some of his ideas and used some of my own observations, and eventually came up with a sorghum-based starter that is stable, smells beautiful, and gives the bread great rise and flavor. As a bonus, I only have to feed it once a day.
3-Day Wild Yeast Sourdough Starter
Concept
Sourdough starters, and gluten-free starters in particular, tend to grow yeast in abundance at the beginning at room temperature. The following method gives the starter a much warmer environment favorable to acetic acid bacteria in the first step. Once this type of bacteria are present, an acidic environment is quickly achieved and the desired lactic-acid bacteria (LAB) and acid-loving strains of yeast will grow in the culture.
Tools
Most of what you need are common kitchen tools:
- Sorghum flour,* as fresh as you can get it. If you grind your own, that's even better.
- 1 gallon of Spring Water (DO NOT use tap water in the starter mixture)
- Gallon-size Plastic bags that seal tightly
- A digital scale - I like this one for everyday use
- A kitchen thermometer. I use the OXO Good Grips Chef's Digital Leave-In Thermometer, but you can get a thermometer for as little as $6 in most grocery stores. It's worth it!
- A small plastic container with a lid.
- Some sort of vessel for holding your plastic bags of starter and maintaining a 95 degree temperature. An insulated cooler can work, but you have to use lots of warm water and weigh the bag down to keep it from floating. You can use a large Thermos or insulated coffee carafe. People have also used a bowl of water over a heating pad and, but you have to have a heating pad that doesn't turn itself off.
Step 1
In a gallon-size bag, mix:
50 g Sorghum Flour
120g Spring water at room temperature
Seal the bag and mix the flour and water until well-combined. Let any air out of the bag and re-seal. Double bag the mixture and let any air out of the second bag, too. Place the bag in a container of water heated to 95 degrees (35 degrees C). Seal the container or keep it on a heating pad. Check it frequently to make sure the water temperature stays constant. Keep the bag at 95 degrees for 24 hours.
Check to make sure that small bubbles have started to form at the top of your mixture. If not, let your mixture cool a few degrees over the next few hours and wait for bubbles to appear before moving to the next step.
Step 2
Open your double-bagged sorghum mixture, being careful not to get tap water inside the bag. If the mixture smells bad, this is a good sign. It means you have successfully cultivated some of the bacteria that you need for the starter. Add:
50 g sorghum flour
80 g spring water
Seal the bag and mix as before. Let any air out, re-seal, double bag, and immerse the mixture in 90-degree water (32 degrees C) for 24 hours, making sure the water temperature remains constant.
Your mixture should be bubbling after the second 24 hours in warm water. This is a good sign. The bad smell should be replaced by a more sourdough-type smell, but it can vary at this stage. Mix the contents of your bag thoroughly. In a small clean (but not chemically sanitized) plastic container place:
15 grams of the water-and sorghum mixture from step 2
60g spring water
50 grams sorghum flour
Let the mixture rest for 24 hours, covered, at room temperature.
Congratulations, you now have a sourdough starter! You can start using it to make sourdough bread now.
Maintenance
Feed your starter every 24 hours at the same time of day:
5 grams starter from the last batch
60 grams spring water
50 grams sorghum flour
Mix with a wooden spoon to combine, cover, and let sit at room temperature for 24 hours. You can use your starter any time after the first 6 hours of fermenting, but always leave enough to make your next batch. The starter will give you the best yeast flavor at six hours, but the optimal time for a sour bread flavor is between 18 and 24 hours.
Double/triple the recipe if you need more starter, but you should only need about 50-100 grams of starter per 2-lb. loaf.
Discard any starter that you don't need, or use it to cook something like these sourdough pancakes, which uses the discards of one day's maintenance.
Troubleshooting
If at any point you mess something up, don't hesitate to start over. You will probably end up saving flour in the long run.
The number one problem I had was getting leaks of tap water inside the bag. Tap water has chlorine in it to kill microorganisms. You are trying to grow microorganisms. Once I started double-bagging the mixture in step one and two I got much better results.
Don't worry about weird smells, especially at the beginning. Sometimes it can take a week before everything really stabilizes in the starter, and it can smell different at different times of day, too. The only smell that's a sign of serious problems is the smell of acetone, like finger nail polish remover. It's a very strong and unmistakeable smell. Acetone means you have to throw your starter out and start over.
If anyone has questions to trouble-shoot, leave them in the comments and I can add them to the trouble-shooting list.
* This recipe should work with dark teff flour as well, but I haven't tested it extensively. Amaranth flour is the only other flour I think might work, but I've used sorghum because it's the most economical and the most widely-available gluten-free flour. Other GF flours have not done as well as these three flours in published scientific experiments as well as in my own kitchen experiments.

Comments
I currently bake sourdough bread but not gluten free. My gluten-free friend saw how delicious my loaves looked and was interested in me making her some GF bread.
I keep my wheat sourdough starter in the fridge so I only have to feed it once a week. Have you tried storing yours in the fridge so you don't have to feed it every day? I'd like the idea of not having to feed it every day.
Still early days for me, I haven't decided upon a flour mix yet, as there really are so many ideas and options out there. It's a shame you aren't selling your personal flour mixes anymore... you mention that you spent a year devising your all purpose flour mix. I'd love to get my hands on it!
I was thinking that instead of feeding the whole thing sorghum and then dividing it, I could divide it and feed part of it bread flour to use, and feed part of it sorghum to store. Have you tried that?