Blond Sandwich Bread Recipe: Grain-free, Dairy-free, Egg-free
It's been awhile since I posted the original Grain-free Sandwich Bread Recipe. That recipe contained an single egg... this one doesn't. To span that gap took endless testing, but here I am with my new egg-free recipe, and it's better than ever!
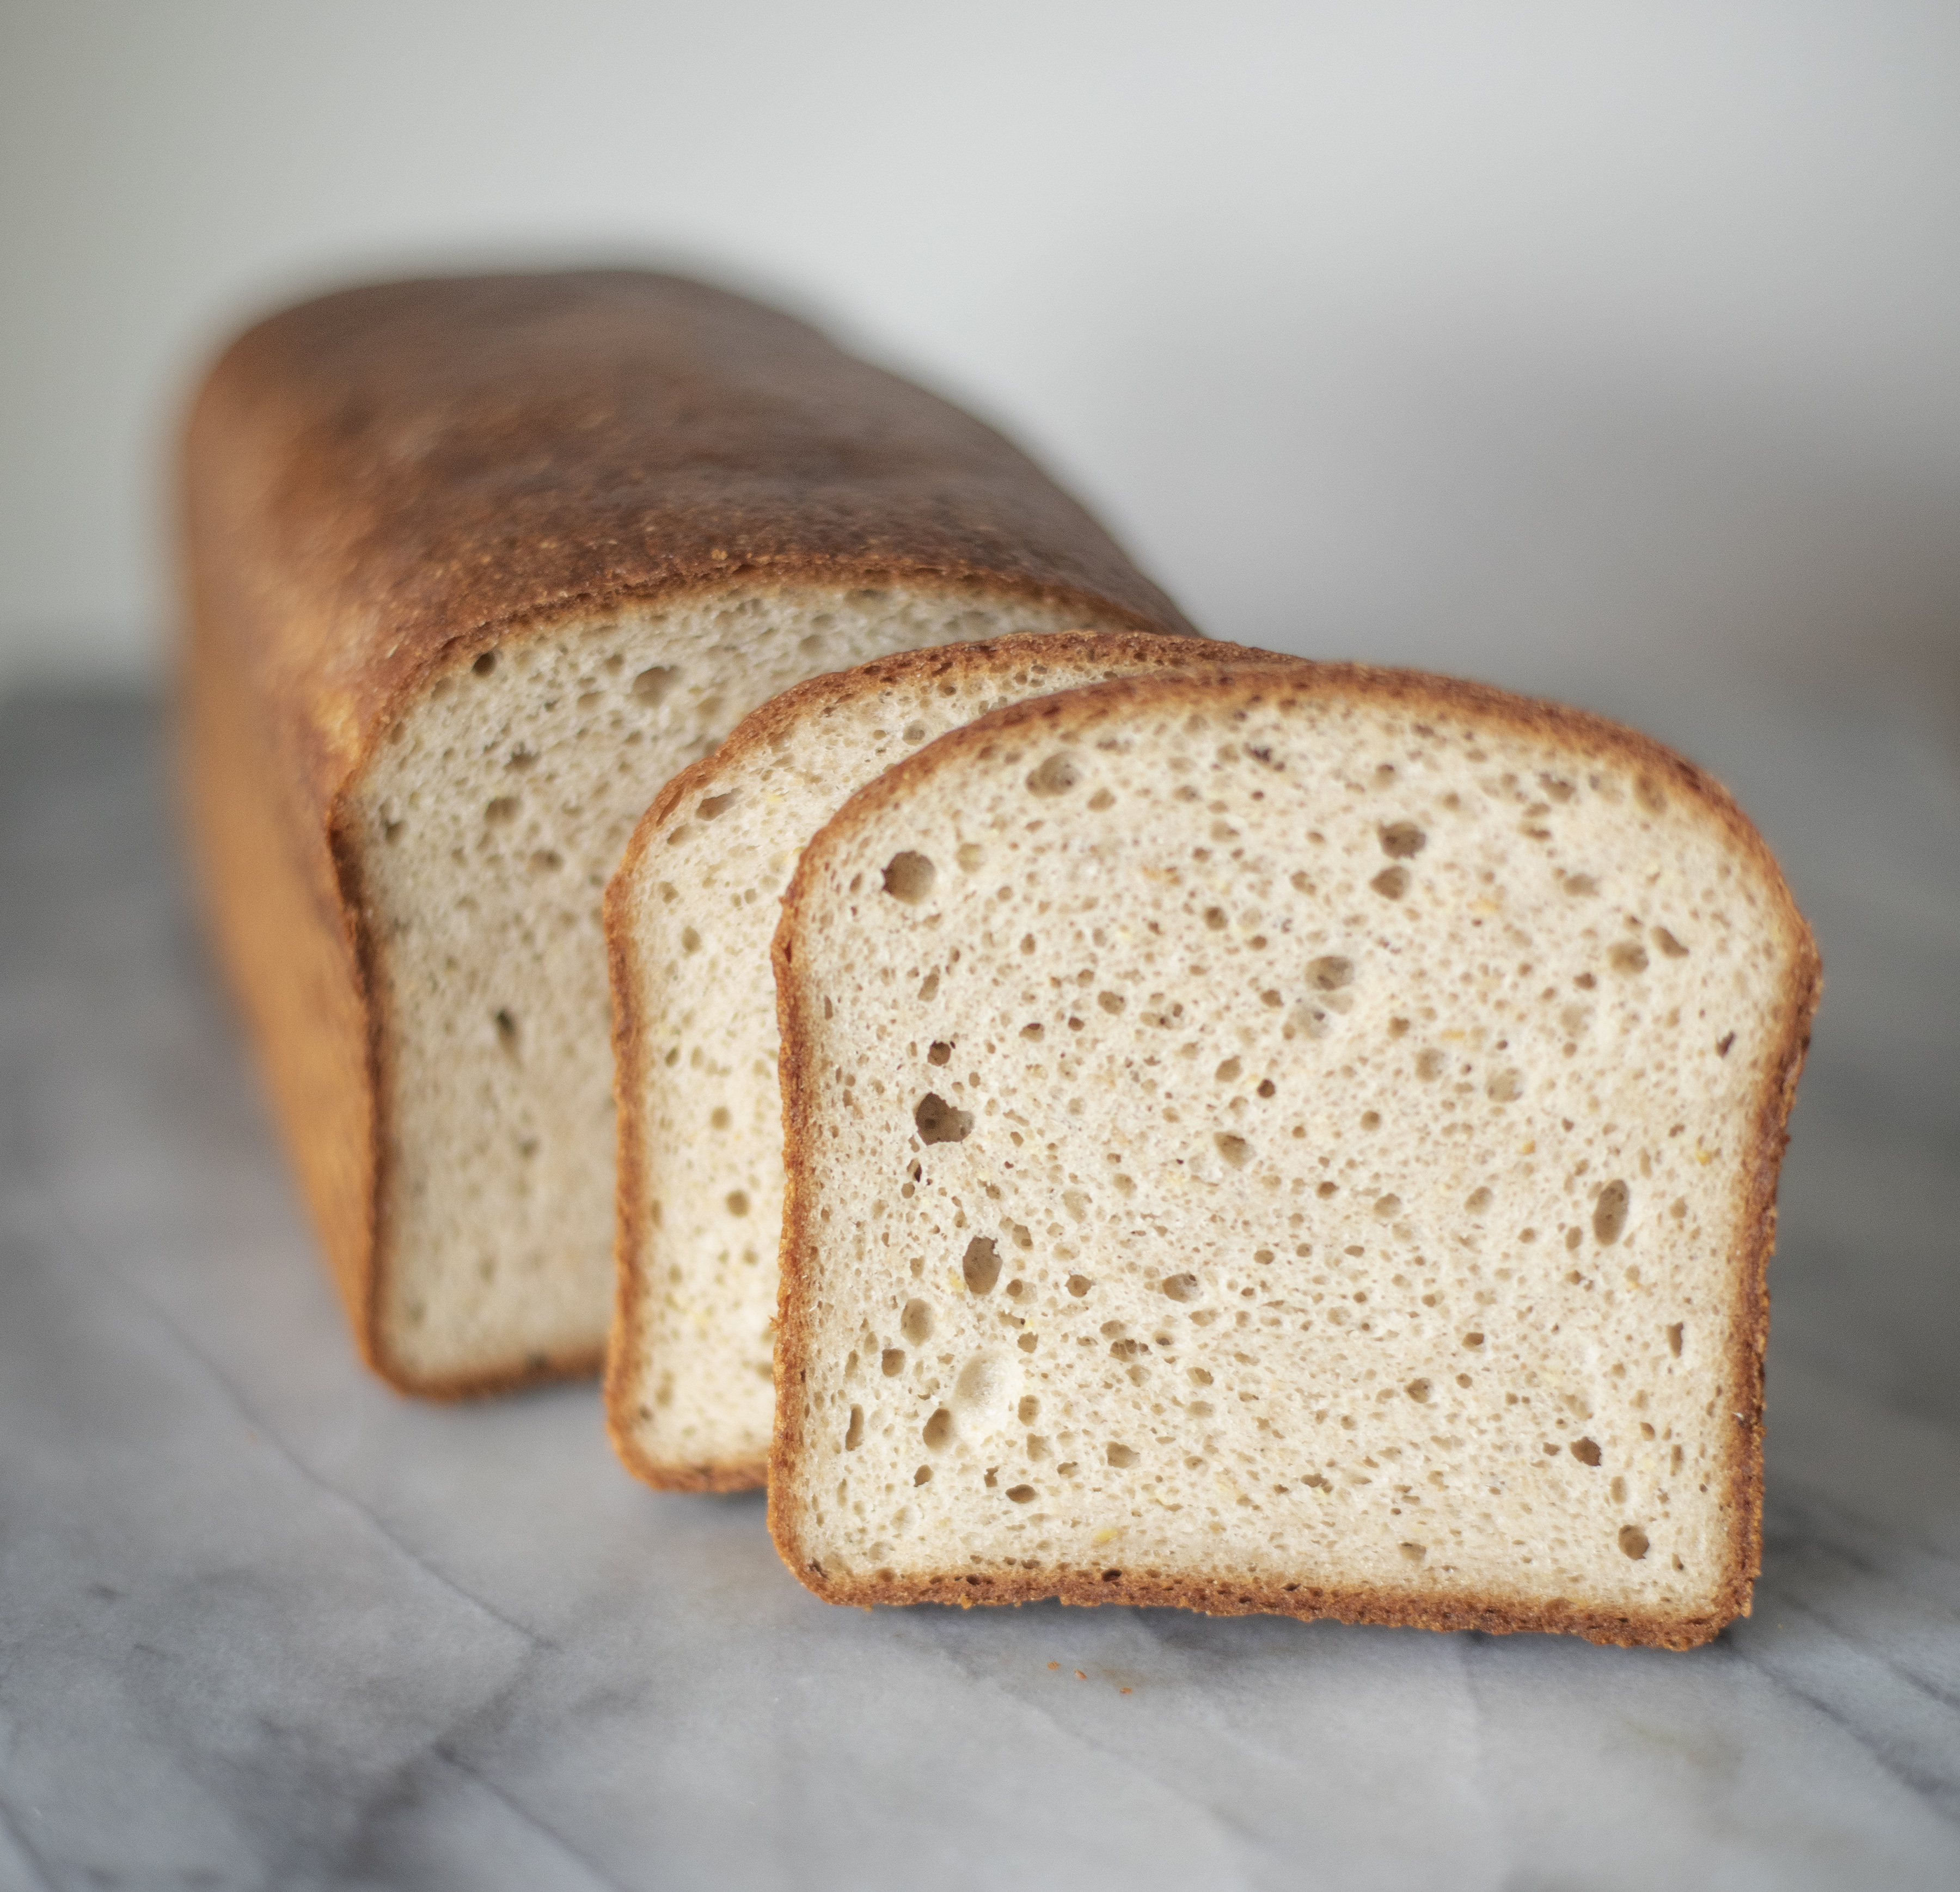
When I make this recipe it fills the house with the most amazing scent of baking bread. But what I like the most about it is how fluffy this bread is, and how flexible.
The egg replacer here is flax seed. It wasn't an exact swap though. I had to make some other alterations, including reducing the starches. However, the result is every bit as fluffy, maybe fluffier, than the original.
A few helpful affiliate links to give you an idea of what tools and ingredients are needed:
A stand mixer. You can hand mix but this tool makes it much easier with gluten-free dough. I use the Kitchenaid Artisan Stand Mixer in black.

I use a 4x4x9 USA Steel Pullman Loaf pan - the lid is optional but I do use it.

I got the buckwheat flour online. I used Anthony's brand buckwheat flour.


Grain-Free Vegan Sandwich Bread Recipe
Mix time: 30 minutes
Rest time: 20-30 minutes
Second mix and placing in the pan: 10 minutes
Rise time: 1-1.5 hours
Bake time: 1 hour
In a large bowl or in the bowl of a stand mixer, whisk together:

450g grain-free flour, a mixture of:
- 170g light buckwheat flour
- 75g Cassava flour
- 25g Quinoa flour
- 90g tapioca flour/starch
- 90g potato starch (not flour)
Whisk in the other dry ingredients:
25g ground psyllium husk
20g ground golden flax seed
15g soy protein powder (or sub protein powder of choice)
3g (1/2 tsp) active dry yeast
8.5g salt
When the dry ingredients are thoroughly blended, add to the bowl:
500g warm water (105°f/40°c)
Mix the ingredients by hand or with the paddle attachment until they come together thoroughly. Let the dough rest for 20-30 minutes. In the meantime grease a 4x9 pullman pan with coconut oil or other oil of choice. Coconut oil or vegan butter is best so you can really work it into the corners. You want the bread to release easily so grease the pan thoroughly.
After the initial rest, add to the bowl:
30g coconut oil
24g sugar
12g (1TBSP) apple cider vinegar
Mix the dough, still with the paddle attachment, for several minutes until thoroughly blended and somewhat loose.

With oiled or slightly damp hands, knead the dough a few times and form a mass. Make it somewhat even, find a smooth side, and place it smooth side up in the greased pan. Press the dough down and smooth it out to the edges evenly.
This dough is enriched so it takes awhile to rise. It doesn't need to rise a lot in the pan - just about 25% by dough volume. It will just have started puffing up in the middle and will barely start rising on the sides when it's ready to bake. For my house in the winter, with the house at low room temp (68°f), this takes about 1 hour and 15 minutes. I mark the side of the pan with a little piece of dough to keep track of the rise.
 |
| The upper mark is a 50% rise, the lower mark for a 25% rise |
 |
| 25% rise |
 |
| 25% rise |
 |
| If you look closely, you can see the original markers on the side of the bread |
 |
| Perfect proofing (left, 25%) vs slightly over proofed (right, 50%) |
When the bread starts puffing up, or sooner if it takes a long time for your oven to warm, turn the oven on to 450°f/230°c.
When the bread is properly risen, spritz the dough lightly with water, cover it with tin foil or the lid of the pullman pan (I just leave mine resting upside-down on top) and bake, covered, for 15 minutes. Then take the cover off and bake another 40 minutes. Loosen the sides with a spatula, then take the bread out of the pan, place it directly on the rack, and bake another 5 minutes or until it sounds extremely hollow when tapped on the bottom.
Let the bread cool on a rack completely before slicing. If you cut it before cooling, it may be a bit off on texture, but sometimes that's worth it for a warm slice. Wait at least half an hour or it won't be set inside and it will be difficult to cut.Substitutions and a note about hydration
Water - Hydration means the amount of liquids in the recipe. The hydration needs can vary depending on the climate and ingredients that people use. The recipe may have to be used as a starting point to get to an ideal hydration for each person making the recipe. That being said, my recipes are created in Portland, Oregon, which has about 30% humidity. If the humidity is very high in your area you may need to reduce the amount of liquid slightly. One reader said that her local humidity is 70% and she reduces the water by 20g, and that works for most recipes this size.
I have done some smaller tests with almond milk and those came out pretty well. I haven't tested this with a full size loaf yet.
Starches - I tried this recipe with 180g of tapioca starch instead of potato and tapioca, and while it came out EXTREMELY flexible it was a little bit unstructured/floppy and the color was a little translucent. It sank a bit while cooling. If you can't do potato starch I'd try subbing it with corn starch or some other starch that adds a little stability. Tapioca starch can be subbed with arrowroot starch 1:1 in most recipes (though I haven't tested it in this one).
Quinoa flour can be subbed for amaranth flour 1:1 in most recipes, though I haven't tested it.
If you can't find golden flax seed, I'm sure regular brown flax seed will work, it just won't be as light a color. If you want to use egg instead, see my original grain-free bread recipe.
Protein powder. The protein is needed to convert the starches during baking so the dough can set and turn into bread. I have tried bean flours, subbing out for the cassava flour or the buckwheat. It does work and gives nice lift, if a tighter crumb. Use about 20g bean flour and reduce the cassava/buckwheat by that amount. The reason I went with soy protein in this recipe is that it's neutral in flavor, whereas even small amounts of bean flour affected the scent and smell of this bread due to the other flavors being so neutral. If avoiding protein powder by using vegan milk, take careful note of how much protein is in the milk. Many vegan milks have little to no protein. The recipe needs about 10g protein total.
Cassava flour (I use Otto's brand) can sometimes be subbed with potato flour, but I have not had good results with the flavor of potato flour so proceed with caution here.

I have tried numerous variations on this flour blend and I do not have recommendations on subbing the buckwheat or other ingredients, but if someone has a successful substitution I'd love to hear about it!
Enjoy!


Comments
I have tried your Classic White Sandwich bread with the rustic white flour blend and with the 60% grain blend. I tried the pizza dough. I also tried two versions of the grain-free Blond Sandwich bread recipe with both light and dark buckwheat flour. All very successful, rising higher than the top of the pullman pan, with wonderful flavour. Photos are available.
Your recipes are outstanding, they are a game-changer. The breads rise high and are delicious. Now we have excellent gluten-free breads to enjoy in our home. A sincere thank you from my wife and me.
Stan
Mississauga, Ontario