One Flour Bread - How to Make GF Bread from (Almost) any Single Flour
It's one of the first things you learn when you start trying to bake gluten-free: use a blend of different flours. No single flour can work. Especially for bread.

No surprise that it didn't work for everything. Glutinous rice flour? No way. The surprise was that it did work for almost everything.
100% Cassava flour.
100% Oat flour.

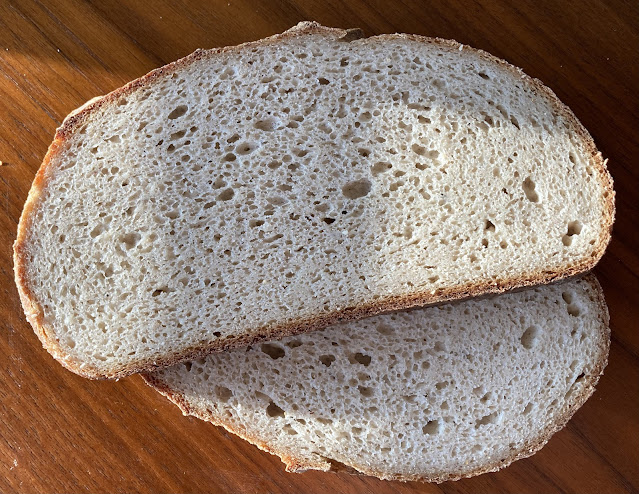
100% White rice flour.

100% Brown rice flour.

100% Buckwheat flour.

Then, the other surprise that shouldn't have been a surprise. My favored grains were the best of the bunch.
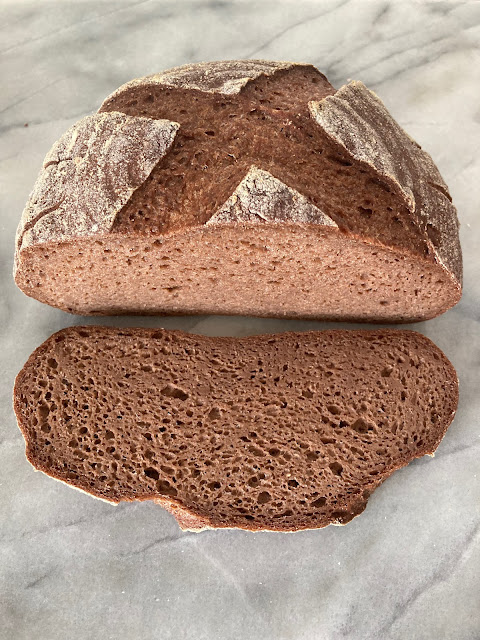
100% Teff flour (this one is sourdough, the rest are yeasted).

100% Sorghum flour.

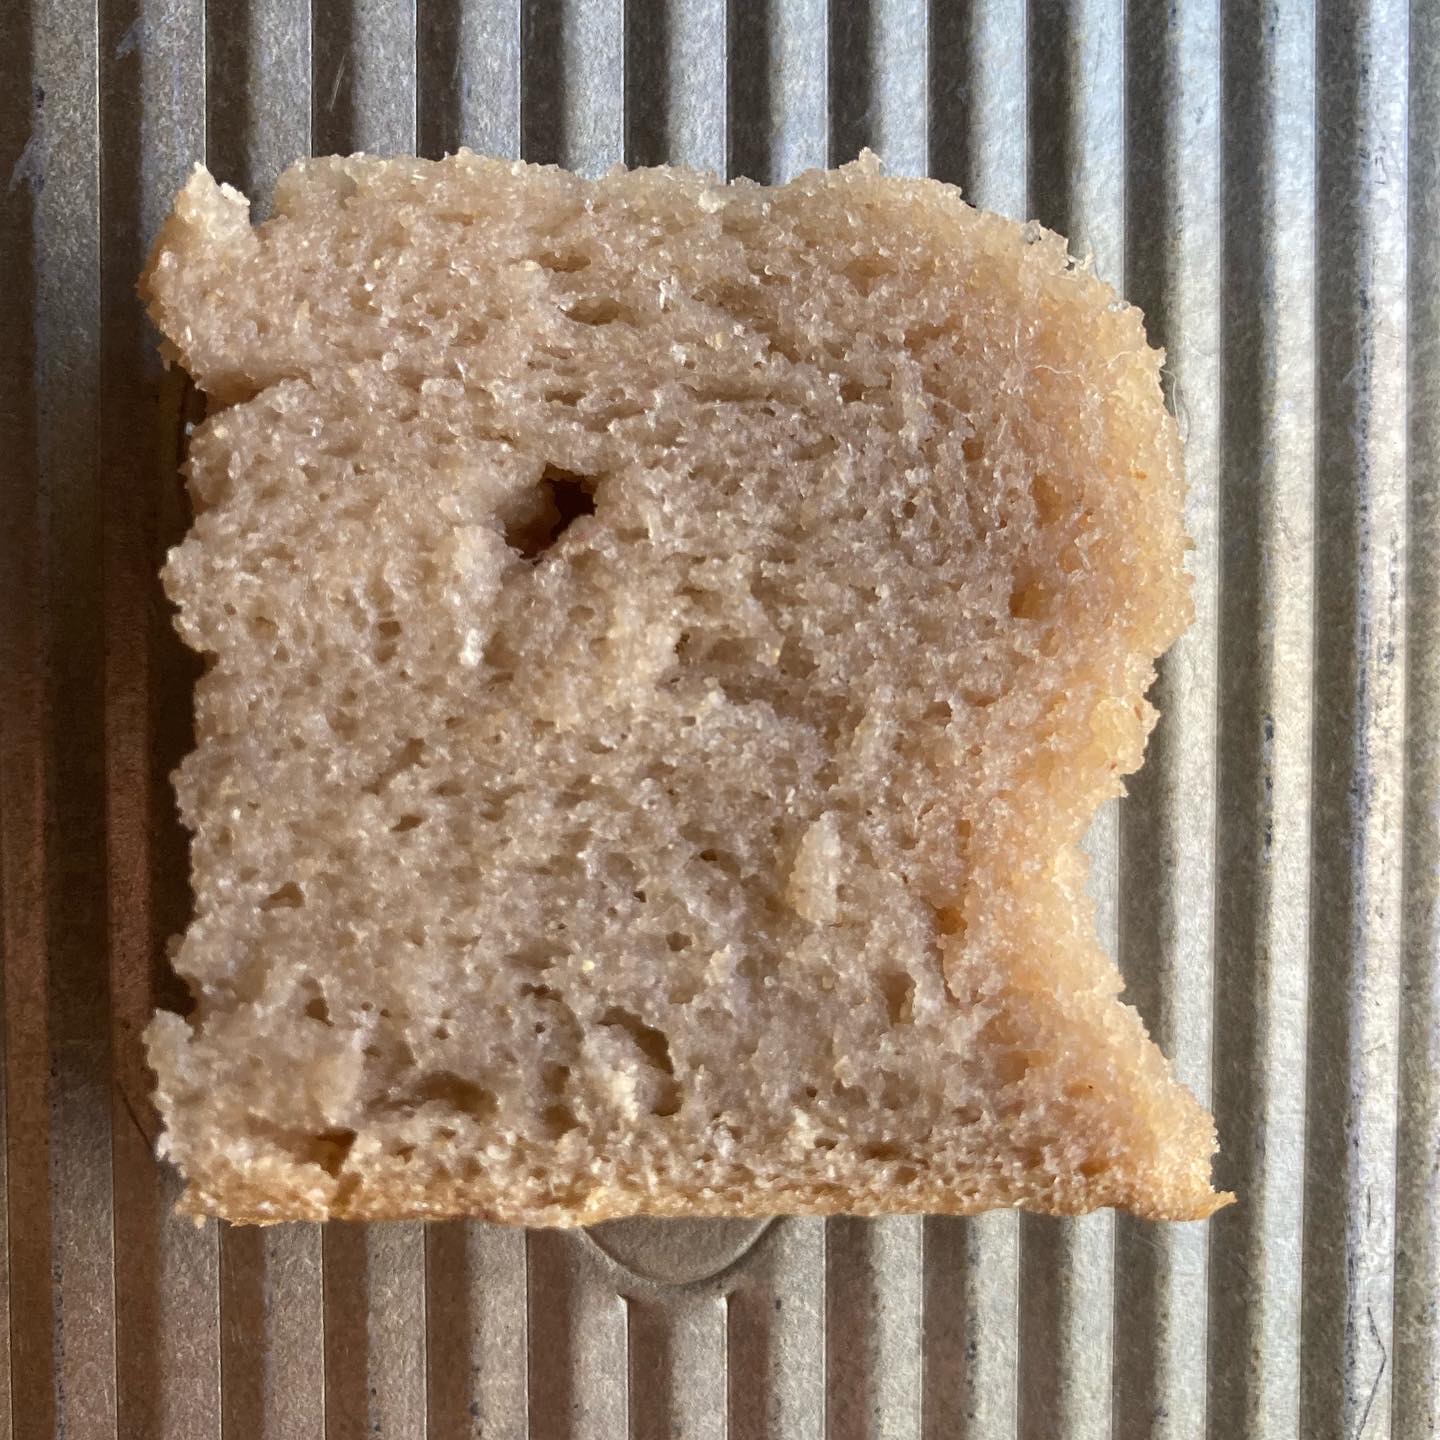
100% Millet flour.

There is a method to my madness. This whole experiment was made possible courtesy of psyllium husk. It's my not-so-secret weapon in GF bread baking. For these experiments I decided to use a powdered form, and I used the minimum amount I generally use for my regular recipes: 4.4% of flour weight. I did a test with a lower amount, and while it did improve the crust it didn't give me what I considered maximum rise and best structure. I used a pre packaged psyllium to make it more consistent (since I usually grind my own). The brand I used is Terrasoul which I ordered on Amazon.

I thought I'd share the yeasted version of the recipe first, with the full method. The thing is that each flour takes a different hydration, so success in making the bread comes from figuring out what that ideal hydration is for your flour. Even if you use the same species, brand, and grind of flour as I do I still recommend starting with this first step in case your climate affects your hydration. I live in the Pacific Northwest and the humidity is usually about 30% in my area. I did some of these tests in Bend Oregon where the altitude is about 4000 feet and the humidity is really low. Some flours showed a small but significant difference in how much water they needed to form a dough.
So, the first step in making your single flour bread is to perform what I call the "tortilla test." This test first came to my attention when I read Marc Matsumoto's No Recipes blog post about tortillas. I then wrote my own post about flour tortillas including the test he prescribes - the tortilla test.
For this bread it's a little different in that you're not going to test the dough itself. You're going to test a small amount of your flour. The more accurate your scale is, the better for this test. I used a gram scale for accuracy, but I started testing on my regular kitchen scale and got most of the way there, a rough estimate at least. But if you want to up your baking game I advise having both kinds of scales.
The Tortilla Test
Determine the hydration of the flour you choose.
Step 1: Weigh 10g of your chosen flour.
Step 2: Weight 10g of warm water.
Step 3: Measuring slowly with a spoon, put 5g of the water into the flour and mix as best you can with a fork or your fingers.
Step 4: If the dough starts to come together, form a ball and press it between your palms. Read the dough as follows:

Notice the edges of the dough. On the perfect dough the edges are smooth. Most likely, your dough is still too dry at this stage, which is 50% hydration. (5g of water to 10g of flour is 50% hydration)
Step 5: Continue adding water .5-1g at a time until the tortilla test comes out perfect. Sometimes the dough dries out or gets scattered and the entire dough weight might not represent 10g flour plus the water you put in. In this case, once you have a perfect test result, weigh the remaining water in your water bowl to verify how much you used. Do the math to get your ideal hydration level, e.g. 7g water is 70% hydration.
Occasionally you'll come across a flour that takes more than 100% hydration (sorghum, cassava, I'm looking at you). In this case you will measure out more water and keep adding it gram by gram until you get a good result on the dough.
If you are not using a gram scale, or you're not sure if you have an accurate measurement of your water, try the test again with a fresh 10g of flour. This time, instead of starting at 5g of flour start closer to what you think is your ideal hydration for better accuracy.
Step 6: Calculate the amount of water you will put in the recipe. The recipe below is for a small test loaf. It only has 225g of flour, less than 2 cups. First, calculate the amount of water you need to hydrate your flour according to the tortilla test. Our example flour takes 70% hydration, which is about what millet takes.
225g flour x .7 = 157.5 (158 rounded)
Then calculate how much water the psyllium needs to hydrate properly. People usually say 1000% hydration for psyllium, or 10x the psyllium weight, but I'm getting better results with this specific psyllium at 800% hydration. I think anything in the 800-1000% range works, so feel free to play around with that.
10g psyllium x 8 = 80
Then add the two water amounts together.
158 (rounded) + 80 = 235
235g is the amount of water you need for a flour that takes 70% hydration.
Once you have determined your ideal hydration level for your flour and calculated your water amount, you are ready to make a single-flour bread!
Recipe for a Single Flour Yeasted Bread

20 minutes rest time
20-60 minutes rise time
30-45 minutes bake time
Mix the dry ingredients in a bowl:
225g millet flour (sub any flour)
10g psyllium powder
4g salt (about 3/4 tsp)
4g sugar (about 1 tsp)
1.5g active dry yeast (about 1/2 tsp)
When the dry ingredients are properly blended, mix in:
235g water at 100°f/45°c (or more/less depending on the results of your tortilla test above)
1 tsp lemon juice or vinegar (optional)
Mix the wet ingredients into the dry ingredients until the dough comes together. Cover and let rest for 20 minutes (this is to let the psyllium hydrate). After resting, mix or knead the dough until it becomes smooth and forms a cohesive ball, 1-4 minutes. With millet, it tends to get a little dry. If the dough just feels too dry, add 10g more water.
Form a ball or shape as desired. Let the dough rise 40-70 minutes, seam side up in a banneton or in a bowl. When you notice it starting to rise preheat your oven (and baking vessel if you have one) to 450°f/230°c.
Some of the doughs are more dense than others, but with millet it's fairly easy to read the dough. A finger poked on the surface should spring back quickly right before it's ready, and spring back slowly when it's fully proofed. The dough does not rise a lot but will be 10-20% larger usually.
When the dough is ready to bake, invert it onto some parchment paper so it's seam side down and place inside your preheated Dutch Oven or other baking vessel. Score the loaf with a sharp knife or lame. If you are doing steam instead this is the time to activate the steam. Bake the dough 15 minutes covered/with steam, then 10 minutes uncovered/without steam. Bake straight on the rack until done, usually another 5 minutes (rice flours take longer to bake). Rap your knuckles on the bottom of the loaf. When it sounds hollow, it's done.
Let the bread cool on a wire rack before slicing.
Enjoy!
 |
| Teaser: This 100%millet loaf had a little sourdough discard thrown in the mix. It made the bread more flexible and the crust a really nice color. |

Comments
From Albany, Oregon
I didn't know how to clear the last hurdle into making proper single flour breads and here you are, with all this incredible work laid out. You have saved me much expensive flour and frustrated experimentation. Thanks, I owe you one.
Yippee