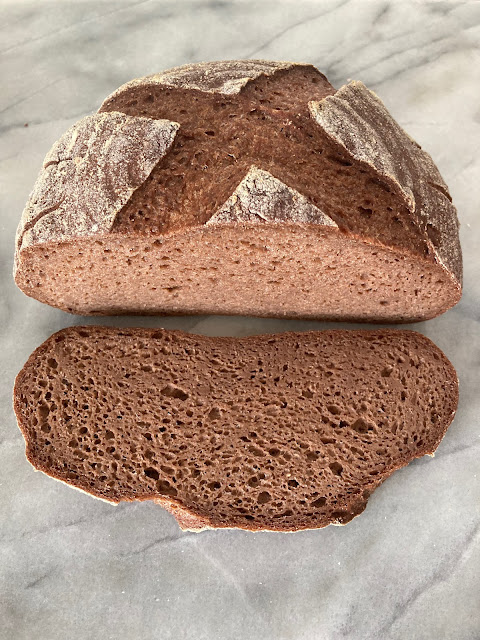
Artisan Teff Bread Recipe

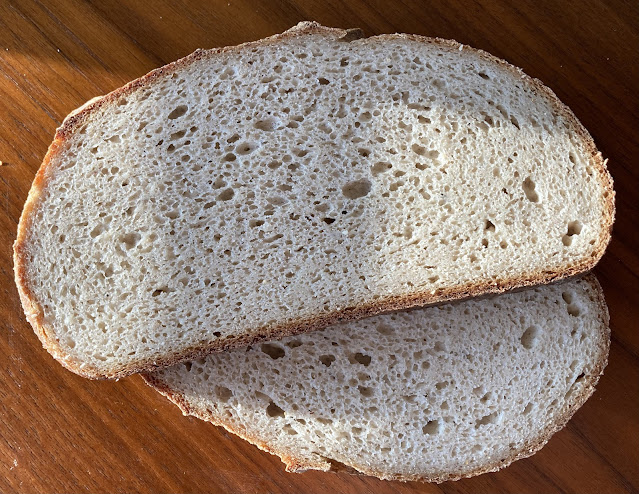
One of the most popular recipes on this blog is The Best Teff Sandwich Bread Recipe. This was one of the first bread recipes that I ever created. I thought I'd follow that up with a recipe for a rustic, artisan loaf with teff flour using all the bread-making techniques I've learned since the beginning. This bread is really soft and spongy. It's a little more dense than the regular bread, but in a nice, substantial way as whole grain breads often are. Check out the boule bread recipe for more tips and photos of the process.
Artisan Teff Bread Recipe

makes one 2-lb round loaf
Mix time: 10 minutes
Rise time: 2-3 hours
Cook time: 35-45 minutes
Mix in the bowl of your stand mixer or whisk together by hand:
520g (about 2 1/4 cups) warm water, 110-120 degrees
Add to the bowl:
100g teff flour
300g GF bread flour (reserve 50 grams for later in the recipe)
12g (1 Tbsp) sugar
3g (1 tsp) yeast
6g (1 tsp) salt
6g (1 tsp) salt
Mix the dry ingredients into the wet ingredients until everything is completely combined and a sticky dough forms.
Let the dough rise, covered, in a warm place for 1 to 1 1/2 hours, or until it has almost doubled in bulk and a dent made with your finger stops filling in right away. Punch the dough down. Knead in with your hands or the dough hook of your mixer:
50g flour

Gather the dough into a ball and cover it lightly with:
olive oil
Remove the dough to a well-floured 8-inch banneton seam side up or simply place seam side down on a piece of floured parchment paper and dust the top with flour. Cover and let rise 20 to 30 minutes in a warm place.


While the dough is rising, place a dutch oven or a pizza stone and an oven-safe pan large enough to cover the bread in the oven and turn it on to pre-heat to 450° F. When the bread has risen slightly and and a dent made with your finger stops filling in right away, gently place the dough seam-side down on your lightly floured work surface, trying not to deflate it. Gently run your hands along the sides of the dough, tucking the sides under slightly. This dough isn't as shapable as the traditional loaf, so you are just trying to pat it into a symmetrical round loaf - don't tuck the dough under too much or stretch the loaf.

When the oven is ready and the dough has been formed, score the top with a sharp blade about 1/4 inch deep in whatever pattern you want.
Carefully place the bread in the hot dutch oven or on the hot pizza stone. Spritz the inside of the dutch oven (or the surface of the pizza stone) with water several times (careful not to spray any glass lids - they can shatter!) and cover. Cook for 15 minutes, then uncovered on the rack until the crust has a hollow sound when tapped on top, usually another 20-25 minutes. Remove to a cooling rack, or for a crisper crust turn off the flame and cool in the oven with the door propped open. Let the bread cool completely for easier slicing.
Enjoy some traditional gluten-free teff bread!


Comments
Thanks for the beautiful recipes!