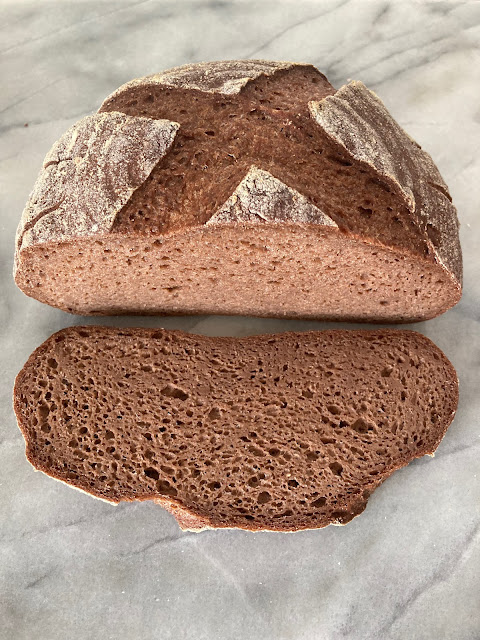
Soft, fluffy bread imbedded with dollops of cheddar and rings of spicy jalepeño is perfect for making sandwiches or eating on its own with butter or olive oil.
The base for this recipe is my famous Mild Country White Sourdough Bread, which was borne of the pandemic sourdough craze and seems to have legs. It's the top post on my site most months and people have been using it as a base for many modifications. Here I took some of the most popular modifications and then added cheddar and jalapeño inclusions to boot.
Modifications from the original include:
- Slight reduction in starch content
- Increase in starter amount
- Decrease in total rise time
- Dough is easier to handle and shape
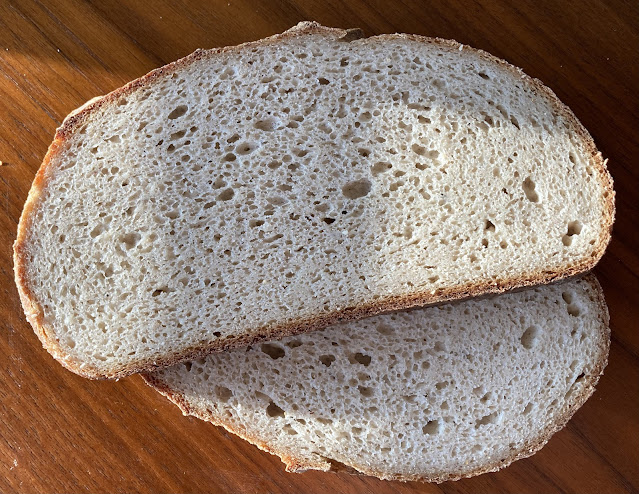
It's even great without inclusions:
Thanks go to: Michael Hollesen of OhAh Glutenfree for showing me that a big rise is possible in GF baking, and all the readers who have commented on the recipe and shared ideas with me, particularly on Roman Jan's Gluten-free Bread Home Baking Facebook group and Chris Stafferton's Facebook group The (Gluten-Free) Bread Club. Find Stafferton's wonderful GF sourdough cookbook Promise and Fulfillment by clicking: here.
Cheddar Jalapeño Sourdough Bread
Gluten-free, contains egg
Mix #1: 20-30 min
Rest time: 2 hours
Mix #2: 1-2 min
Rise time: 4 hours
Chill time: 20-40 minutes
Bake time: 45-55 minutes
Total time: 7-8 hours, or more if needed
If you don’t have a sourdough starter, try this easy recipe ready in 5 days: https://glutenfreegourmand.blogspot.com/2023/03/teff-sourdough-starter-recipe-ready-in.html
 Gel in a separate bowl:
265g Spring water at room temperature
25g Psyllium husk, ground
Mix in a stand mixer:
140g tapioca starch
140g potato starch
60g ivory teff (or brown teff for a more rustic look and pronounced whole grain flavor)
40g millet flour
30g potato flour
24g sugar
When dry ingredients are mixed, add:
80g sourdough starter, at or past its peak, preferably either teff, millet, or brown rice
12g or 1 tbsp apple cider vinegar
100g egg whites (3 egg whites for me)
135g Spring Water*
Mix with paddle attachment on low. The dough will look crumbly at first but mixing for three minutes should create a wet dough. If mixing by hand, it may take a little longer but you don't have to mix constantly.
Add the psyllium gel from the first step to the wet dough and mix until well combined, about two minutes.
Mix on low until incorporated:
15g pink Himalaya salt
Let rest in bowl of stand mixer, covered, about 2 hours.
Mix the dough again about 1 minute, scraping down the sides and re-mixing if needed.
Add to the dough:
120g of Cheddar, cubed into pieces a little less than a centimeter wide (1/4-1/2 inch)
35-50g of Jalepeño, sliced thick
Mix the dough again slowly to incorporate the cheddar and jalepeño inclusions.
Once the inclusions are incorporated and distributed evenly throughout the dough, turn the dough out onto a floured surface and form a mass. Fold the corners into the middle and turn the ball seam-side down onto a floured surface. Shape the dough into a ball. This time I tried poking all the cheddar and jalepeño pieces into the dough so they weren't right on the surface. I'm not sure how effective this was in preventing the cheese from dripping out but it's a nice thought. Place the dough ball seam-side up in a banneton or a bowl lined with cloth.
Check the level it’s at and note the height of the center of the dough or take a photo.
Let rise (covered) at room temp ~70°f/21°C until it just barely starts rising, 4 more hours or about 6 hours total ferment time from first mix. The top will dome up about one rung higher on the banneton, or 1 cm or 1/4-1/2 inch higher. Other indications of readiness are that the dough starts looking puffier on the surface, that it no longer smells like raw flour, and it’s jiggly and springy when poked. The surface is suddenly less tacky.
Conversely, signs that it is not ready at the 6-hour mark are that it has sunken, spread out or shrunk slightly, that it still smells like raw dough, and that the center looks very raw and maybe even transluscent. The pattern of dough on the surface is still very sharp and defined. If the dough is not ready yet and shows these signs of underfermentation, it may take several more hours for it to proof. This can be a sign that the starter was not active enough or that the ambient temperature is a little low. It will proof but it can take some extra patience.
Once the dough starts rising, place the banneton, still covered, in the freezer for 30-40 minutes. In the mean time preheat your oven to 450°f/230°C with your baking vessel inside (cloche (pictured), dutch oven, or roasting pan - alternately, use steam in your oven if that option is available). Remove the chilled dough from the freezer and carefully invert onto lightly floured piece of parchment paper.
Additional tightening up of the shaping is optional here. I didn't tighten up the shaping on this loaf and it came out a little unevenly shaped. However, that might have been the inclusions poking out and the seams bursting. It might have helped to do some additional scoring. This loaf did not have any issues with the bread getting condensed at the bottom of the slice so that's a win in my book. However, if you think the bread has spread out too much, or you want a tighter shape, tuck the edges under a bit to firm up the shaping. Be as gentle as possible since the dough is already proofed. The chilling helps with handling but care is needed to shape gluten-free dough after it has risen. Transfer the bread to the pre-heated baking vessel and score.
Score: for this boule type I usually do an X slash and clip the inside corners with scissors so the pointed tips don't stick.

Bake 30 minutes covered, and 15 minutes uncovered in a baking vessel. If at any point it starts looking too brown on top before the bottom is set, then turn down the heat in the oven to 375f/190c. Since this recipe has so much egg it’s best not to brown it too much because egg burns easily. Eggy breads also get very firm and dry inside if overcooked. If it still needs additional time (not hollow sounding tapped on bottom) then leave it in the oven right on the rack (I kept it on the parchment to avoid dripping cheese into the oven) with the oven turned off and the door closed. After the bottom of the loaf is set and firm, and makes a hollow sound when tapped with the knuckles, you can cool it on a cooling rack, or, if you would like to prevent shrinkage, you can cool it in the oven for awhile with the door cracked open. I usually do this if the seam of the bloom isn’t completely set and crusty on top. Wait until mostly cooled to slice.
 |
| Olive and Rosemary |
*A note about hydration:
My recipes in general seem to need hydration adjustments for other climates/other grinds of flour/random acts of nature. This recipe for me can go either up or down in hydration and still come out. A higher hydration might create a slightly tackier feel to the inside, but the bread will stay fresh longer and have a more open crumb. A lower hydration makes the dough a little bit easier to handle and shape. It can take a few tries with a new recipe to nail down the perfect hydration for any baker.
Substitutions:
Teff - Sorghum or cassava flour are the most common subs for teff.
Millet - I have successfully subbed this out for quinoa flour. Some readers have successfully subbed light buckwheat for millet.
Starches - corn starch is usually a good sub for one or both of the starches. I have tested it as a sub for potato starch.
Potato Flour - cassava flour is a good sub for this which I have tested. Potato flakes, the kind that are for instant mashed potatoes, can also be subbed (crushed to a powder). One reader had surprisingly good success subbing brown rice flour for this.
Egg whites - I have not yet found a sub for egg whites. Whole eggs will not give the bread the same lightness and volume, but the bread will still turn out. Some people have tried aquafaba with varying degrees of success, but it hasn't really worked for me.
Apple cider vinegar - you can leave this out or sub for lemon juice.
Enjoy your gluten-free bread!


 Gel in a separate bowl:


Comments
Red more
Helen
I'm using the flours & starches as written. I decreased water in the wet ingredients to 115g and got some improvement. I am now using shredded extra sharp cheddar cheese and am partially dehydrating my jalapeños, which also made some improvement. My Dutch oven is preheated as written. My ivory teff starter is over a month old and consistently bubbles and increases in size (not quite double) I live in Texas; house temp is around 77 degrees and 50% humidity during the day. I decreased bulk fermentation time and proof time to stop over fermentation problems (huge, tunneling holes).
Why am I still getting a gummy bottom on my boules?? And it often sinks while cooling.